Inspecting Drive Belts
*EASY*
You should inspect the accessory drive belt(s) every 3,000 miles. As a matter of convenience, the belt(s) can be checked when the oil is changed. Use the following procedure:
- Park the vehicle on level ground with the engine OFF, the parking brake engaged, and the transmission in PARK (for automatic) or REVERSE (for manual) after the engine has been brought up to operating temperature through some use. This will warm and stretch the belt slightly for a correct tension reading. Lift the hood.
- Identify all belts using the owner's manual. They run around pulleys located at the front of the engine. On front wheel drive vehicles, the pulleys will be located on one side of the engine compartment since the engine faces sideways.
- Examine as much of the belt as possible. Look at the top surface but
twist it to look at the underside and sides as well. Look for defects including
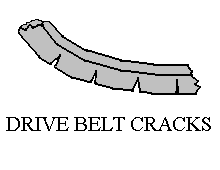
cracks, tears, frays, glazing, grease or layer separation.
If any of these defects exists, the belt should be replaced. If the belt is glazed (shiny), it has lost its gripping ability because slippage has caused its surfaces to rub against the pulleys and become polished. Engine oil or grease on the belt will cause it to rot and slip too. Small cracks on the rib side (underside) of a serpentine belt are the result of normal wear and do not, as a sole condition, necessitate belt replacement. However, numerous deep cracks on a V-belt indicate the belt is being used on a pulley that is too small. A notched belt should be used instead. Repeat the inspection for all belts. - Next, check the belt(s) for appropriate tension. Appropriate tension is
achieved when the belt deflects 1/2" for every 1 foot distance between
pulley shafts. Push on center of belt with thumb while engine is off and
measure deflection. Test the longest free span.
If the deflection is too great, the belt is too loose. If deflection is too little, the belt is too tight. For a very accurate measurement, a belt tension gauge can be used if the owner's manual gives the correct belt tension (in lb.). - If the tension is correct but the belt is known to squeal during operation, apply belt gripping adhesive to the belt. If the squealing changes pitch, the belt should be replaced. If the squealing stops entirely, the belt is showing signs of wear and will need to be replaced eventually.
- If the squeaking or squealing persists after belt adjustment or replacement has been done, the bearings of a component (e.g., air conditioning compressor or alternator) may be worn. To confirm, remove the belt from the component if possible and run the engine. Be sure the belt does not drive any essential engine component first. If there is no squeak while the belt is off, the component is faulty and must be replaced.


